Upload an Already Built Wordpress Installation to Amazon Ec2 Hosting
In this pace y'all volition deploy Jenkins on your EC2 case by completing the following tasks:
-
Connect to your Linux instance
-
Download and install Jenkins
-
Configure Jenkins
Connect to your Linux instance
After yous launch your instance, you tin connect to information technology and utilise it the manner that you would use your local auto.
Before you connect to your instance, get the public DNS proper name of the instance using the Amazon EC2 console. Select the case and locate Public DNS.
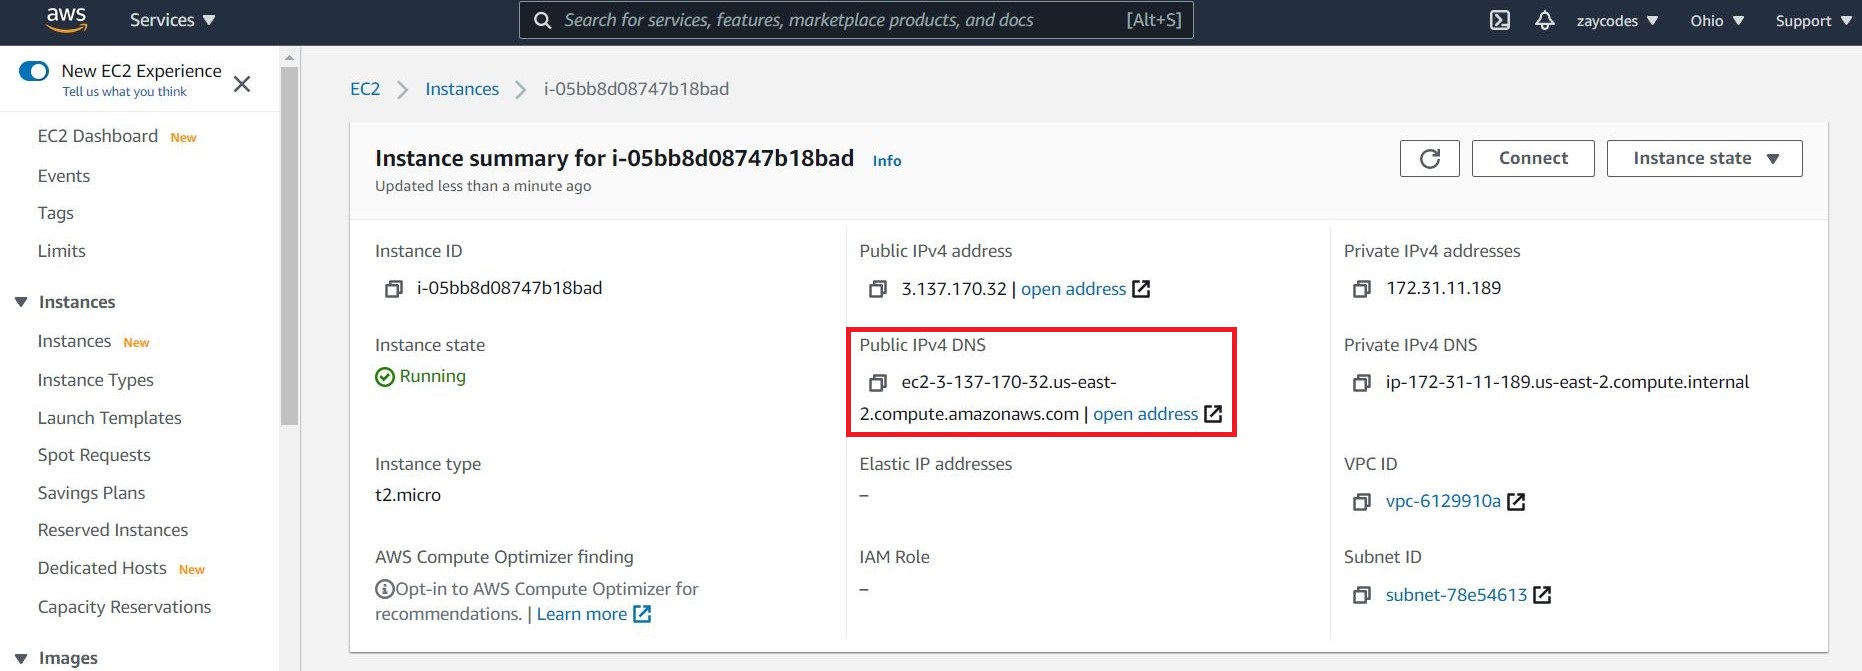
| If your example doesn't accept a public DNS name, open the VPC console, select the VPC, and cheque the Summary tab. If either DNS resolution or DNS hostnames is no, click Edit and change the value to yes. |
Prerequisites
The tool that y'all use to connect to your Linux instance depends on the operating system running on your computer. If your computer runs Windows, y'all will connect using PuTTY. If your computer runs Linux or Mac Os X, you will connect using the SSH client. These tools require the utilize of your cardinal pair. Be certain that you lot created your central pair as described in [Create a key pair using Amazon EC2].
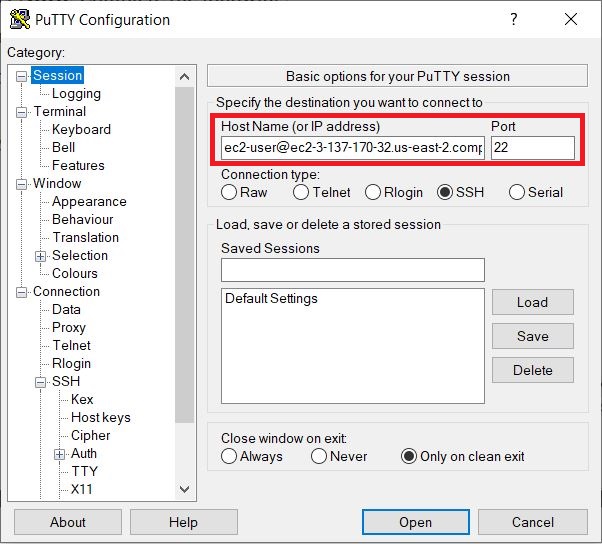
Using PuTTY to connect to your instance
-
From the Offset carte du jour, choose All Programs > PuTTY > PuTTY.
-
In the Category pane, select Session, and complete the following fields:
-
In Host Proper name, enter ec2-user@public_dns_name.
-
Ensure that Port is 22.
-
-
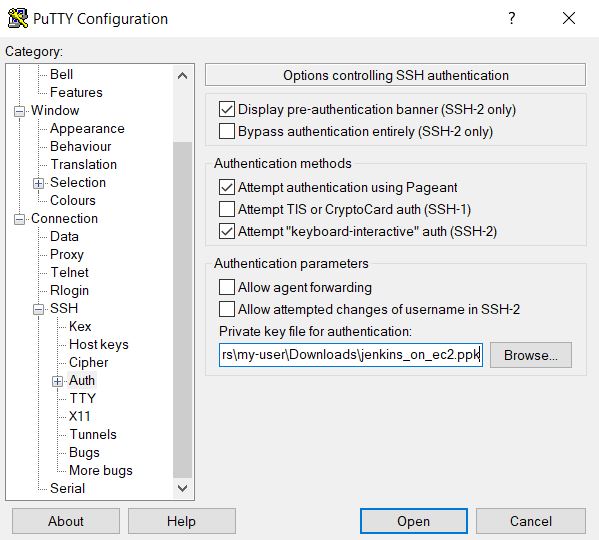
In the Category pane, expand Connection, expand SSH, and and then select Auth. Complete the following:
-
Click Browse.
-
Select the .ppk file that you generated for your key pair, equally described in [Create a primal pair using Amazon EC2] and then click Open.
-
Click Open to start the PuTTY session.
-
Using SSH to connect to your example
-
Use the ssh command to connect to the example. You lot will specify the private cardinal (.pem) file and ec2-user@public_dns_name.
$ ssh -i /path/my-key-pair.pem ec2-user@ec2-198-51- 100-one.compute-one.amazonaws.com Y'all will see a response like the following:
The authenticity of host 'ec2-198-51-100-1.compute1.amazonaws.com (10.254.142.33)' deceit be established. RSA key fingerprint is 1f:51:ae:28:bf:89:e9:d8:1f:25:5d:37:2d:7d:b8:ca:9f:f5:f1:6f. Are you sure you want to continue connecting (yes/no)? -
Enter yes.
You will see a response like the post-obit:
Warning: Permanently added 'ec2-198-51-100-ane.compute1.amazonaws.com' (RSA) to the list of known hosts. Download and install Jenkins
To download and install Jenkins:
-
To ensure that your software packages are up to appointment on your instance, utilize the following command to perform a quick software update:
[ec2-user ~]$ sudo yum update –y -
Add together the Jenkins repo using the post-obit control:
[ec2-user ~]$ sudo wget -O /etc/yum.repos.d/jenkins.repo \ https://pkg.jenkins.io/redhat-stable/jenkins.repo -
Import a central file from Jenkins-CI to enable installation from the parcel:
[ec2-user ~]$ sudo rpm --import https://pkg.jenkins.io/redhat-stable/jenkins.io.fundamental [ec2-user ~]$ sudo yum upgrade -
Install Coffee:
[ec2-user ~]$ sudo amazon-linux-extras install java-openjdk11 -y -
Install Jenkins:
[ec2-user ~]$ sudo yum install jenkins -y -
Enable the Jenkins service to start at kick:
[ec2-user ~]$ sudo systemctl enable jenkins -
Offset Jenkins as a service:
[ec2-user ~]$ sudo systemctl start jenkins You can check the status of the Jenkins service using the command:
[ec2-user ~]$ sudo systemctl status jenkins Configure Jenkins
Jenkins is now installed and running on your EC2 instance. To configure Jenkins:
-
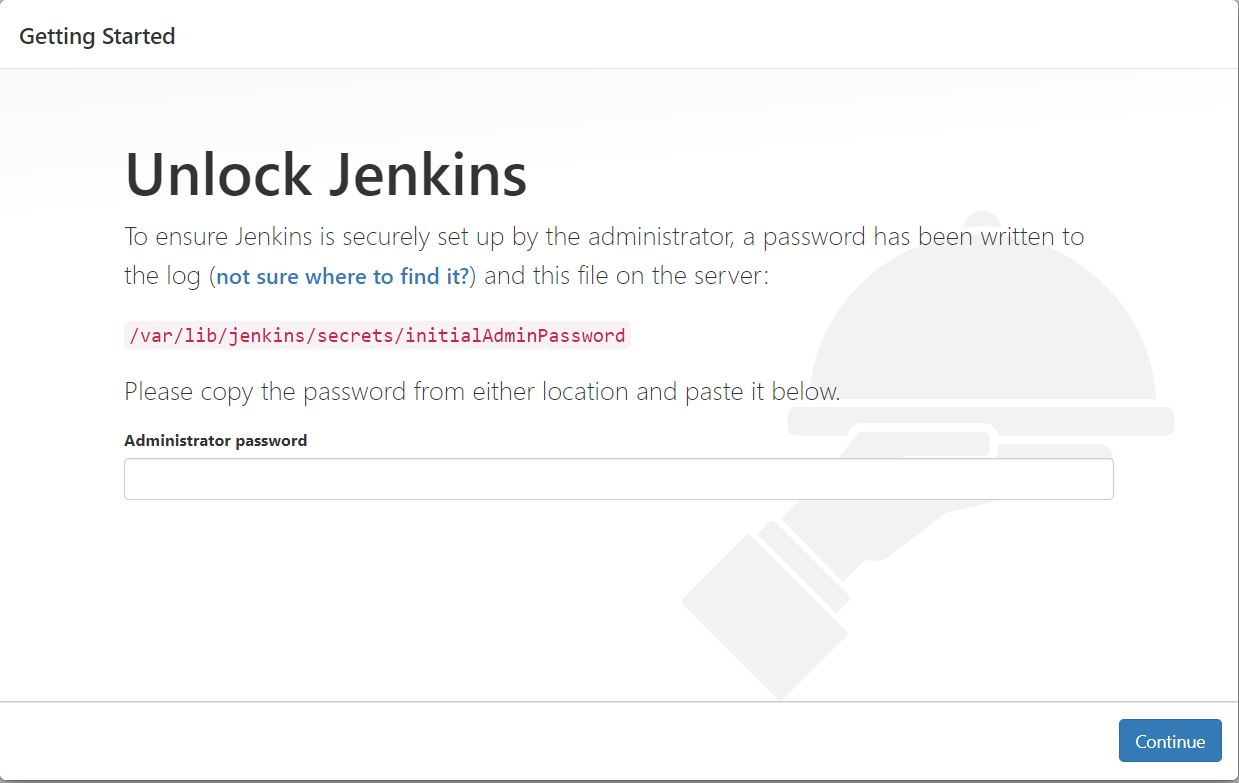
Connect to http://<your_server_public_DNS>:8080 from your favorite browser. You volition be able to access Jenkins through its management interface:
-
As prompted, enter the password institute in /var/lib/jenkins/secrets/initialAdminPassword.
Use the following command to display this password:
[ec2-user ~]$ sudo cat /var/lib/jenkins/secrets/initialAdminPassword -
The Jenkins installation script directs you to the Customize Jenkins folio. Click Install suggested plugins.
-
Once the installation is complete, Create First Admin User, click Save and Continue.

-
On the left-hand side, click Manage Jenkins, and then click Manage Plugins.
-
Click on the Available tab, and and then enter Amazon EC2 plugin at the top right.
-
Select the checkbox side by side to Amazon EC2 plugin, and then click Install without restart.
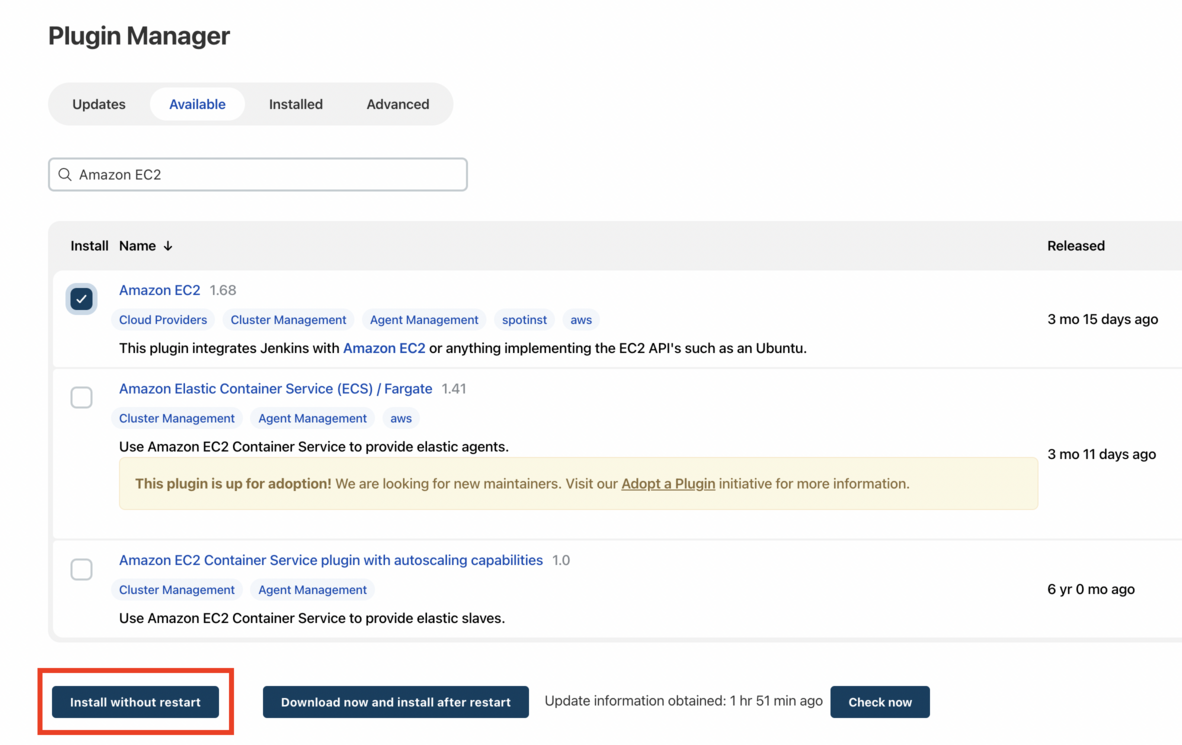
-
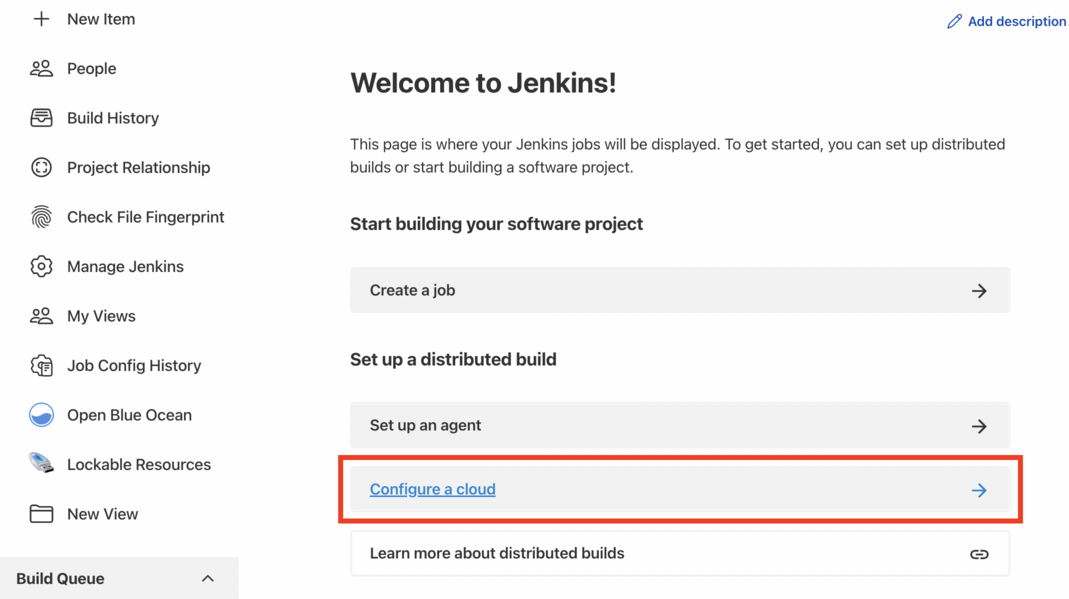
Once the installation is done, click Back to Dashboard.
-
Click on Configure a cloud.
-
Click Add a new cloud, and select Amazon EC2. A collection of new fields appears.
-
Fill out all the fields. (Annotation: You lot will have to Add together Credentials of the kind AWS Credentials.)
Yous are now ready to use EC2 instances as Jenkins agents.
Source: https://www.jenkins.io/doc/tutorials/tutorial-for-installing-jenkins-on-AWS/
0 Response to "Upload an Already Built Wordpress Installation to Amazon Ec2 Hosting"
Post a Comment